How to wash your cycling kit
Avoid shrinking or damaging your cycling clothing with the help of our top tips
Tom Hallam-Gravells
Online Production Editor
Providing protection from the elements and a cool look — as far as we’re concerned anyway, especially in the case of GCN’s new AGU collection — cycling kit is important.
That's why you need to take good care of it to ensure that it lasts as long as possible. Key to this longevity is the wash process. Fall foul of some common mistakes, and you’ll end up working your way through kit faster than your bank account can handle.
But don’t worry! In this guide, we’ve pulled together some top tips on how to correctly wash cycling clothing.
Rinse out excessive dirt
If you’re one of the brave souls who rides on through cold, wet and windy weather, the chances are your kit will end up covered in dirt.
Rather than throwing really dirty kit straight into the washing machine, give it a quick hose down in the garden first. This will remove big clumps of mud and dirt, giving your washing machine a fighting chance of getting everything gleaming again.
In the height of winter when there’s a strong chill in the air and you don’t want to be stood outside with a hose, simply take this step indoors and use a shower - make sure you rinse out the shower basin at the end, everyone else in your house will appreciate it.
Don’t leave dirty clothing lying around
Damp and sweaty cycling clothing is a breeding ground for bacteria, which is why you shouldn’t leave it lying around for very long. Always throw it in a washing machine as soon as possible after your ride.
Avoid using dirty kit too. All of the dirt and grime will work its way into the fabric, potentially damaging it and reducing its longevity. That also means replacing clothing more often, which will deliver a blow to your bank balance.
- Read more: What gear do you need to start cycling?
Use a mesh bag to wash your cycling kit
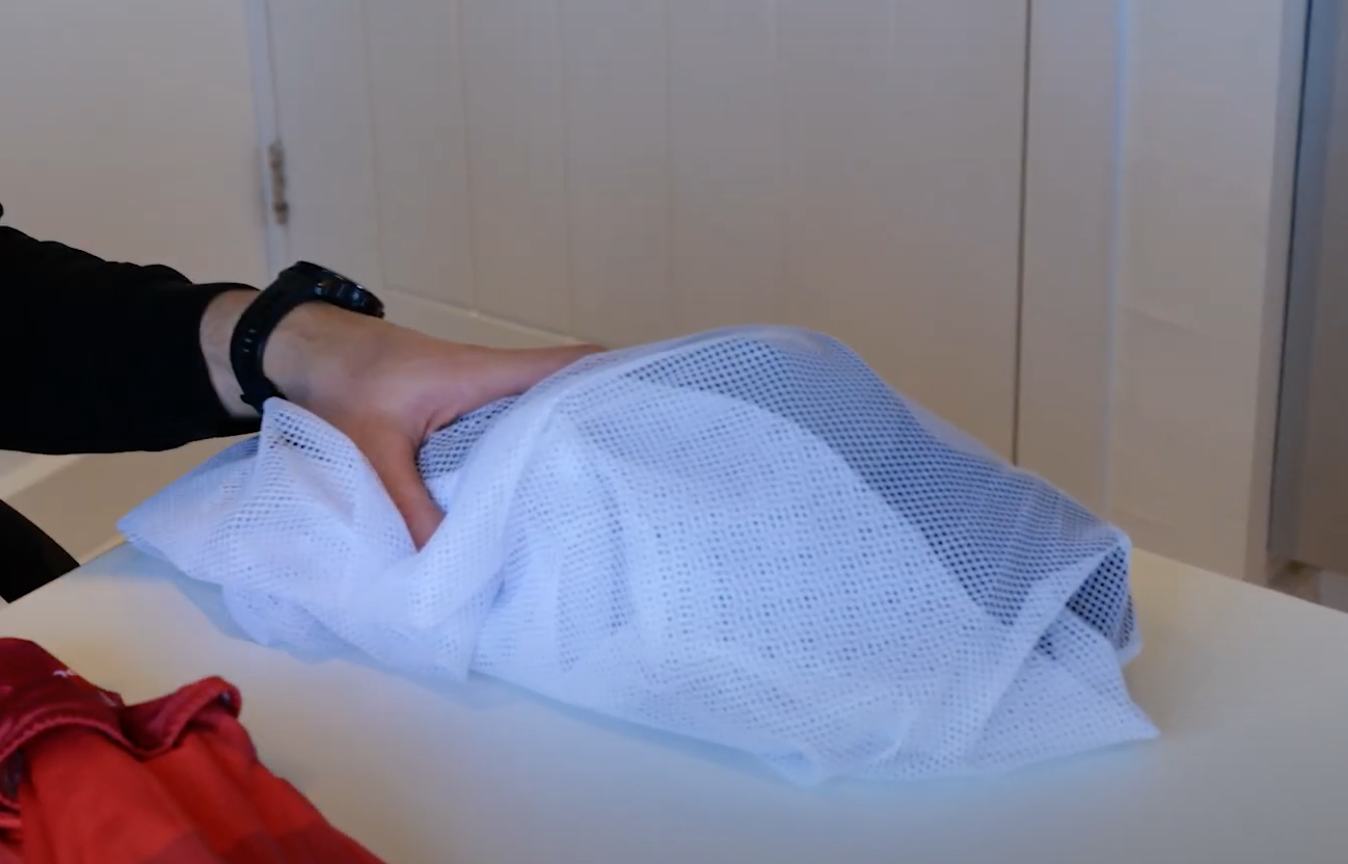
© GCN
A mesh bag will protect your clothing
Don’t put your cycling clothes directly into the washing machine. When let loose with other clothing, kit can get tangled and stretch, with the shoulder straps on bib shorts being particularly vulnerable. Place everything in a mesh bag to separate them from other items, and put this in the washing machine.
Some bags are also designed to stop the spread of microfibre plastics, which are released while washing clothing. For example, the Guppyfriend bag collects microplastics to reduce microplastic pollution by a claimed 90%.
Turn kit inside out and fasten zips
While it’s tempting to throw everything into a bag and then put the bag in the washing machine, you should take the time to prepare the clothing first.
For a start, fasten up the zips on any jerseys. The metal on zips is abrasive and can damage other clothing.
Also, turn clothing inside out. This will help to reduce colour fading, so your jersey will retain its pristine colourful glow.
Finally, make sure any velcro is securely fastened and none is exposed. It is usually used on gloves or overshoes and can stick to pieces of clothing, potentially damaging them.
Wash new kit on a cold cycle
© GCN
Use a cold cycle when washing kit for the first time
Before wearing new clothing, wash it on a cold cycle. It’s not essential but will help to prevent colour from bleeding on subsequent washes.
This is especially important if your clothing is sublimated, which is how most cycling clothing gets its colouring.
Then stick to 30 degrees Celsius
Wash your kit at 30 degrees Celsius, unless any of your clothing specifies a lower temperature, but this is rare.
Don’t go higher or you run the risk of shrinking kit, which won’t be very flattering on your next club ride.
Many washing machines also have sports settings. These will stick to 30 degrees Celsius whilst also lowering the spin rate, so it’s going to lower the risk of damaging your clothing during the wash cycle.
- Read more: How to pick the right clothing for cycling
Avoid bio detergent and fabric softener
Many cyclists fall into the trap of using their standard washing capsules or detergent, which is fine as long as it’s non-bio detergent.
Avoid biological detergents as these contain enzymes that will degrade your kit over time. That once again means you’ll end up replacing things more regularly and spend plenty of money in the process.
Don’t use fabric softeners either. They may give your regular clothing a nice feel, but they can be disastrous for cycling clothing, especially water-resistant fabrics, potentially destroying their water-repellent coating.
Keep drying simple: Hang them on a line
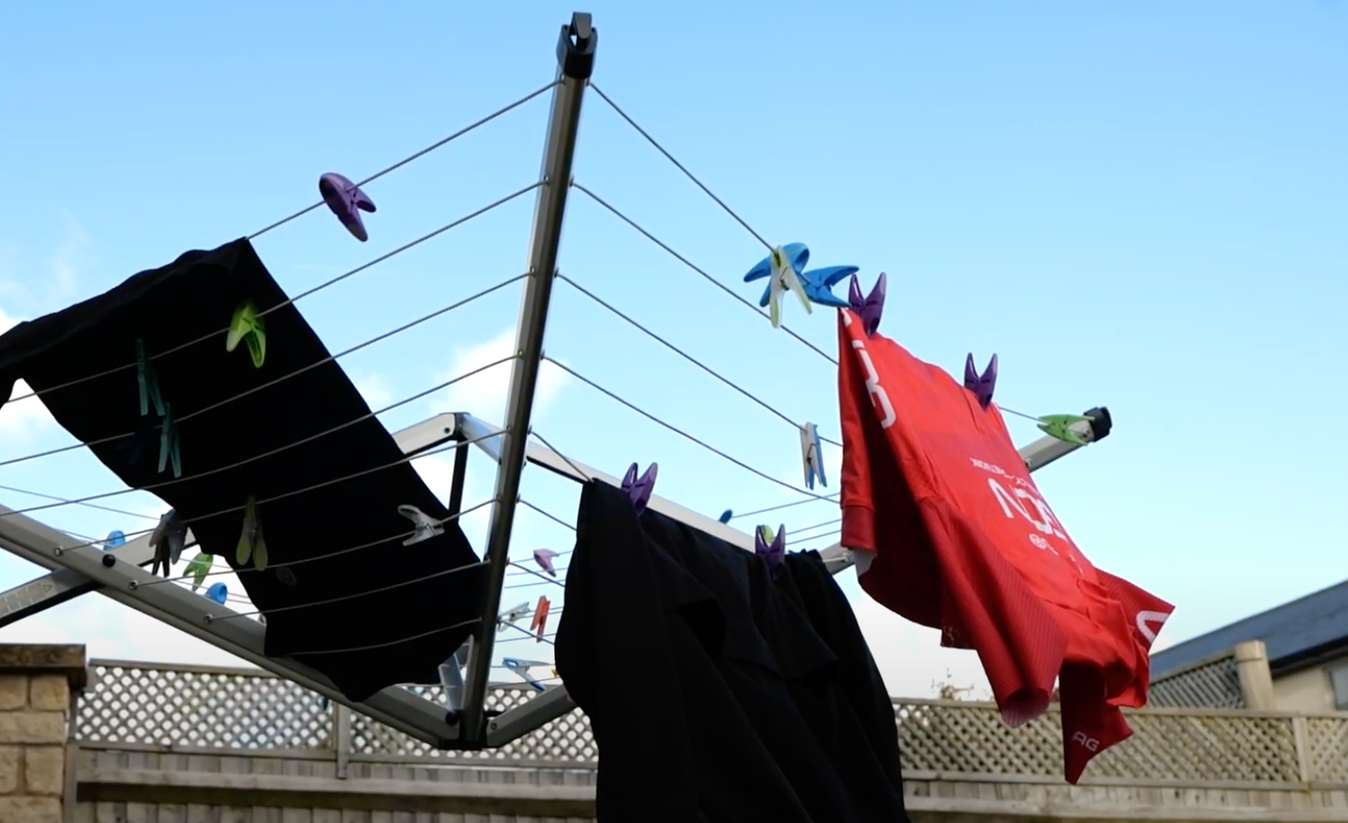
© GCN
Dry most of your cycling clothing on a washing line
Sometimes the old methods are the best and that’s the case for drying cycling kit.
Simply stick it out on a washing line to dry. Don’t take the shorter and easier route by using a tumble dryer. Certain items, like those made from Merino wool, will stretch, while tumble dryers generally wear clothing faster.
There is a caveat to this rule when it comes to waterproof clothing. Hang this out with the rest of your clothing but when it's mostly dry and only slightly damp, throw it in the tumble dryer on a low setting for 20 minutes. This will reactivate any water-repellent or proofing properties. You can recreate this step with an iron, but make sure it’s only on a low heat and you place something between the iron and your kit, like a towel.
For more top tips for maintaining your bike and equipment, check our How To Maintenance library.


Latest Videos
1The Endurance Marker That Separates The Best From The Rest | GCN Show Ep. 596

2Our Most Epic Bikepacking Challenges Yet [2 Hour+ Compilation]
![Our Most Epic Bikepacking Challenges Yet [2 Hour+ Compilation]](https://img.youtube.com/vi/SE98S09MUIA/mqdefault.jpg)
3Easy Hack for Tubeless Tyre Sealant Removal

4Who’s Ready For The Tour de France? Ranking Pogacar, Roglic, Vingegaard & Evenepoel | Racing Show

5Cycling The World's Largest Bikepacking Event | A 500km Epic In Tuscany

.jpg?w=600&auto=format)
Related Content

How to pick the right clothing for cycling
You don’t want to be too hot or too cold when riding your bike but by making smart choices with cycling kit you can find that happy balance and make your next ride more comfortable

How to remove dried tubeless sealant from your bike's tyres
Removing dried-on sealant will keep your tyres light and performing at their best, but it can be a hard task

How to join a cycling club
Joining a new club isn't always as simple as it sounds, so here are our tips for finding a group and getting involved

8 ways to protect your bike from theft
Yes, you need a big lock, but there's far more to bike security than that